
Paper plate crafts - colorful fish
Be sure to click the title of this post "Paper Plate Crafts - Colorful Fish" above, or "Read More" below to see the list of supplies needed, step by step instructions, and a bigger picture of our completed fish |
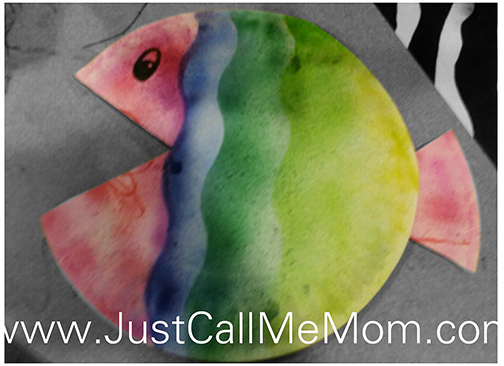
As the mother of a toddler, (22 months) I try to stick to activities that require a short attention span. This paper plate fish is a perfect example of a quick but exciting toddler activity to do together. The one pictured here, we both worked on, using Crayola Supertip Markers and our Crayola Marker Airbrush.
We did this project again when our friend came to play (18 months) but I didn't get any pictures of the finished product. That time, I had a bunch of 1 inch circles punched out of colorful scrapbook paper. The boys picked out which circles they liked, then used paintbrushes and white school glue to "coat" the plate. They stuck their circles on, let it dry, and then I cut the plate and attached the fin for them. |
Colorful paper plate fish
You Will Need
|
Instructions
1. Decorate your paper plate: We used crayola supertips washable markers and the crayola markers airbrush for this one, but you can use anything. Paint, stickers, markers, crayons, stamps, etc.
2. Cut a large "V" into your paper plate: The open "v" shape will serve as the mouth of the fish, and the triangle cutout piece will be the fin. 3. Tape or Glue the triangle cutout "fin" to the back of the paper plate like a tail fin. 4. The Eye: I used a Sharpie marker to draw an eye, but again, the possibilities are endless. You can draw one, attach a googly eye, or create your own special way of giving your fish an eye |
Toddler Friendly Crafts: Colorful Paper Plate Fish
Share Your Art & Ideas
Have you or are you going to try this paper plate fish? Do you have any other ideas for kids paper plate crafts? I'd love to see your kid friendly arts & crafts. Please feel free to comment below with any questions, notes or feedback or to show off your activities with kids.
|
|
|
|
 RSS Feed